Before diving into this tutorial its important to know how to set up for interlocking crochet and how to work the basic stiches, trif and trib.
As you know, the pattern relies on working two meshes at the same time. The yarn A mesh is always bigger than the yarn B mesh. You will only ever work into stitches of the same colour as the yarn you are currently working and you never work into the chain spaces.
Because we have so much going on the patterns are written slightly differently to one of my standard crochet patterns. The pattern is written with two sets of instructions for each row, one for each yarn colour. Which will look like this:
Row 3 (RS): Drop B to front.
A: Ch3 (does not count as a stitch), miss first st, trif, ch1, *trib, ch1; rep from * to last 3 sts, trif, ch1, 1tr in last tr, 1tr in t-ch, do not turn. 74sts
B: Ch3(does not count as a stitch), miss first st, *trib, ch1; rep from * to last st, trif in last tr, ch1, trif in t-ch, turn. 72sts
It starts with the placement for yarn B. Pay careful attention to which direction yarn B is dropped in before you start working yarn A row - it matters!
You will then pick up yarn A and work the instructions for yarn A
into the yarn A mesh. When you have finished, place a stitch marker in the loop that was on your hook and place the hook into yarn B and work the yarn B instructions into the yarn B mesh. After this place the stitch marker into the loop on your hook and turn the work and begin working the instruction for A on the next row. And so on.
To make the pattern as concise as possible we make the assumption that you are always only working into a stitch of the same colour in the row immediately below. All chain spaces are missed but we don't mention that each time.
The count (74sts/72sts in this example) at the end of the row is the stitch count of trebles (and sometimes including the turning chain but never the chain spaces) in that colour once the row is completed.
So lets give it a go with a simple sampler. Here is the pattern for those ready to dive in and below I will give a row by row tutorial and my top tips for getting it right
Simple Sample Pattern
Foundation Row: In yarn A, 21fdc, turn.
Row 1 (RS):
A: Ch1, *1dc, ch1, miss one st; rep from * to last st, 1dc in last st, do not turn. 11dc
B: Coming in from behind, attach yarn B in the first missed st at the start of the row, ch4 (counts as 1tr, ch1), working into the missed sts only, *trib, ch1; rep from * to last missed st, trib in last missed st, turn. 10tr
Row 2 (WS): Drop B to front
A: Ch4, *trib in dc, ch1, trif in dc, ch1; rep from * to last 2 sts, trib in dc, ch1, 1tr in last dc, do not turn. 11sts
B: Ch4, *trif, ch1; rep from * to last st, trif in t-ch, turn. 10sts
Row 3 (RS): Drop B to back.
A: Ch4 (counts as 1tr, ch1), *trib, ch1, trif, ch1; rep from * to last 2 sts, trib, ch1, 1tr in t-ch, do not turn. 11sts
B: Ch4, *trib, ch1; rep from * to last st, trib in t-ch, turn. 10sts
Row 4 (WS): Drop B to front
A: Ch4 (counts as 1tr, ch1), *trib, ch1, trif, ch1; rep from * to last 2 sts, trib, ch1, 1tr in t-ch, do not turn. 11sts
B: Ch4, *trif, ch1; rep from * to last st, trif in t-ch, turn. 10sts
Repeat Rows 3 and 4 for pattern, continuing until you have a square, or feel confident with the technique.
Let's break it down
So lets step through it a little bit slower. The foundation row and Row 1 were as we worked in the set-up so you can see those in more detail here.
After you have worked Row 2A your piece should look like this:

After row 2B it will look like this:

After Row 3A:

After 3B it will look like this:

Now onto Row 4. After the Row A it should look like this:


Now you've mastered the pattern reading! I'll leave you with my top tips for keeping things on track
Top Tips
- Right and Wrong side are only to keep track of the two patterns, both sides can be beautiful if you choose the correct patterns.
- Use another stitch marker to show the right side of the work to help you recognise where you are
- If both your yarns are at the same end of the row then you have completed it, if they aren't then you still need to work the Yarn B row.
- Your meshes should interlock not the stitch, the yarn of the opposite colour should never get caught within the stitch.
- Always use a stitch marker to keep the non-working yarn in place. No matter how big a loop you pull up, without a stitch marker to secure it, it always finds a way to unravel.
- Always check you've dropped yarn B in the correct direction. You'll have to undo the whole of the Yarn A row to correct it if you haven't!
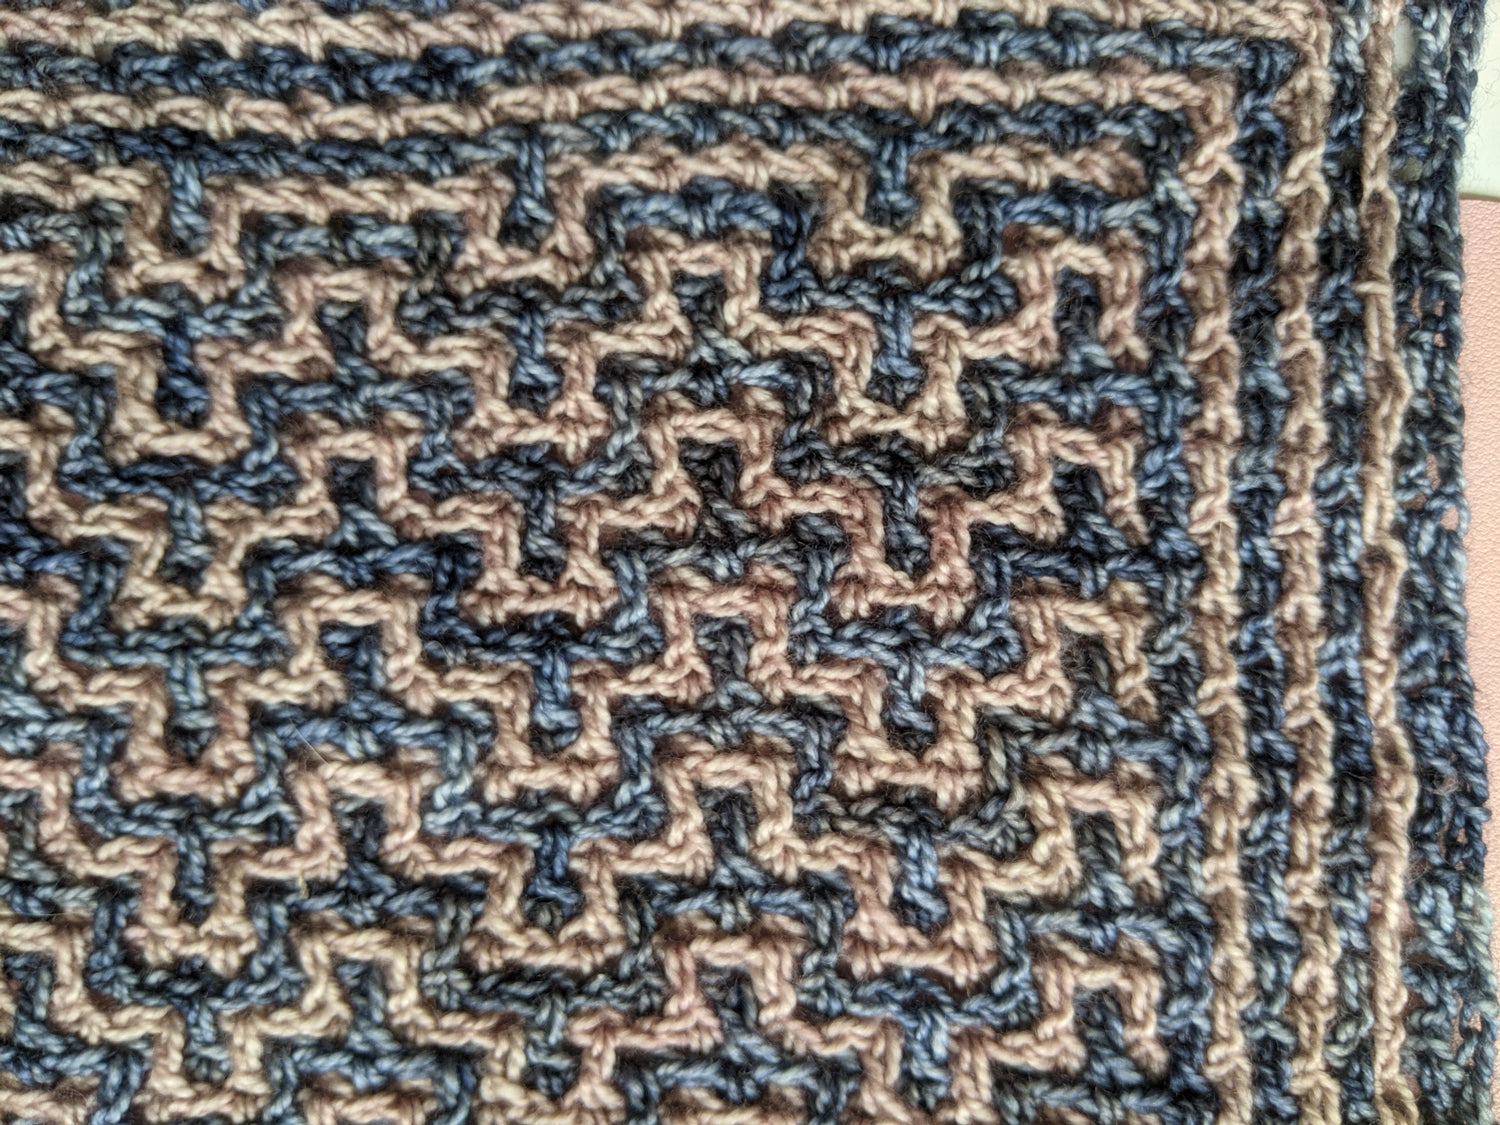
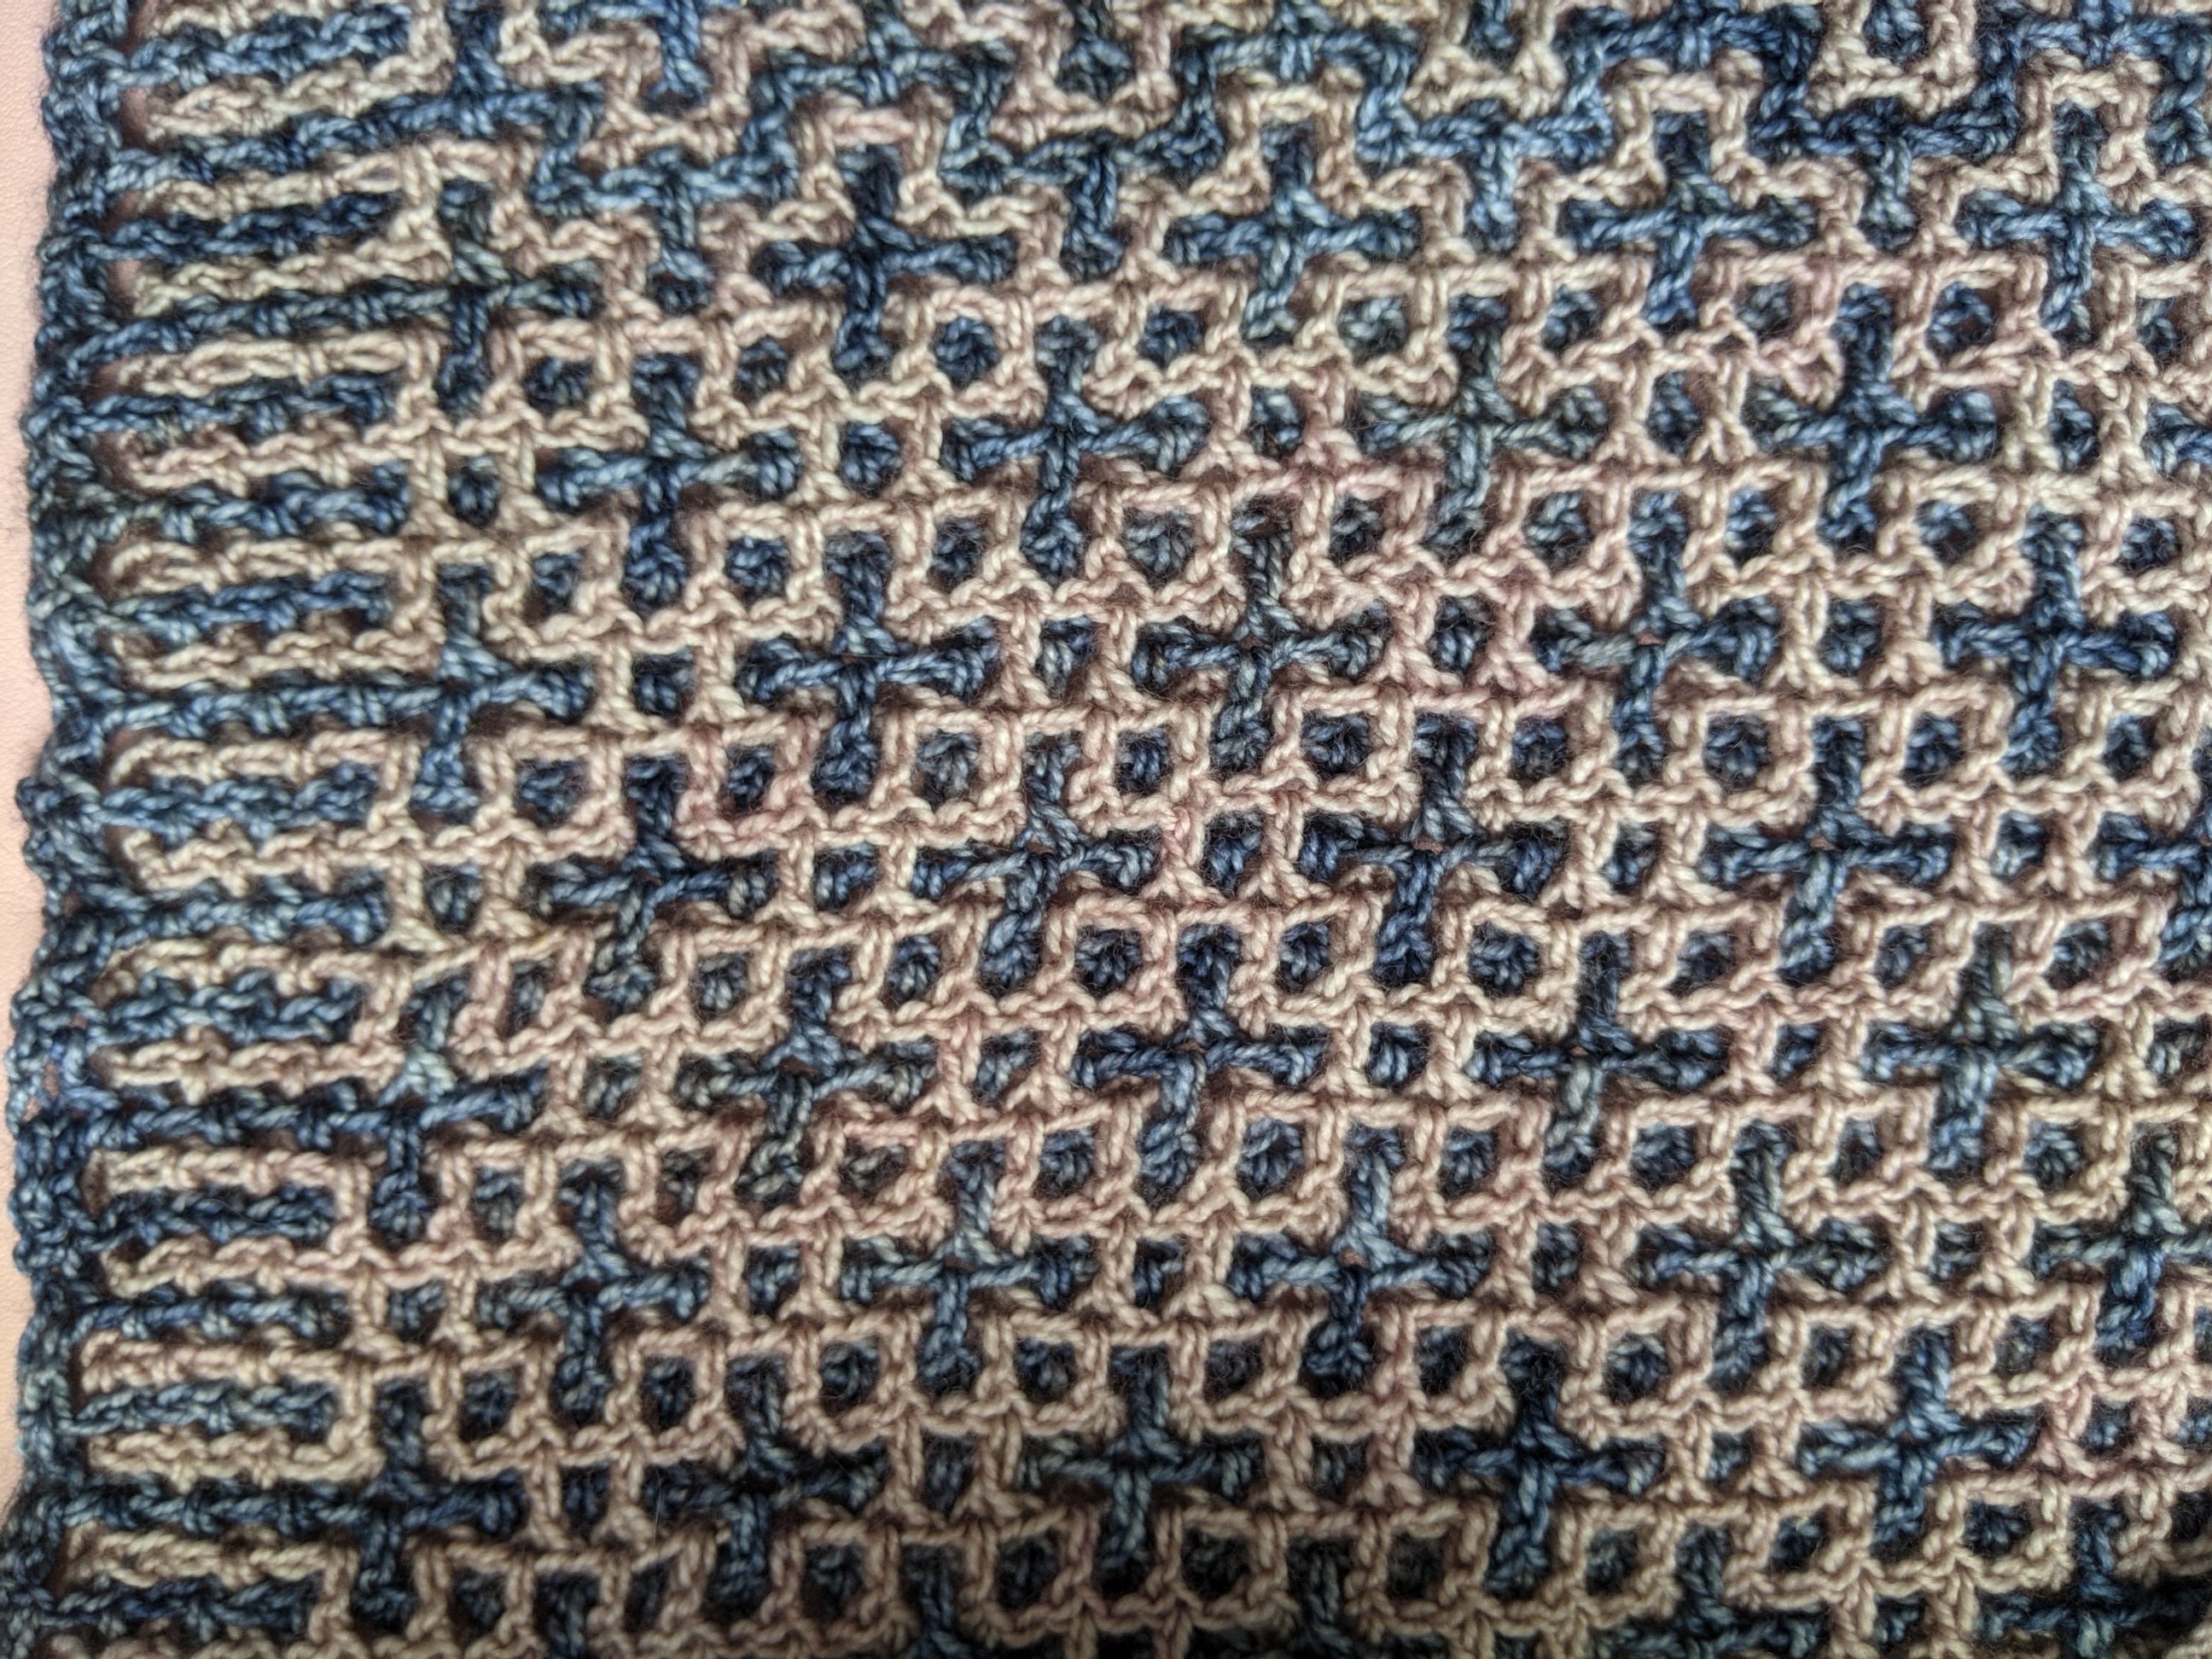
And you are ready to put it into practice:
Leave a comment
All comments are moderated before being published.
This site is protected by hCaptcha and the hCaptcha Privacy Policy and Terms of Service apply.